So first things first. Install WSL. Plenty of literature on how to do that. I personally am using Ubuntu 18.04 Bionic.
Installing the ARM compiling tools is relatively easy, but make sure you have removed any old ones. So execute the following within the Linux shell running under windows:
sudo apt-get remove binutils-arm-none-eabi
sudo apt-get remove gcc-arm-none-eabi
I found the most realiable option is to install the PPA versions:
sudo add-apt-repository ppa:team-gcc-arm-embedded/ppa
sudo apt-get update
sudo apt-get install gcc-arm-embedded
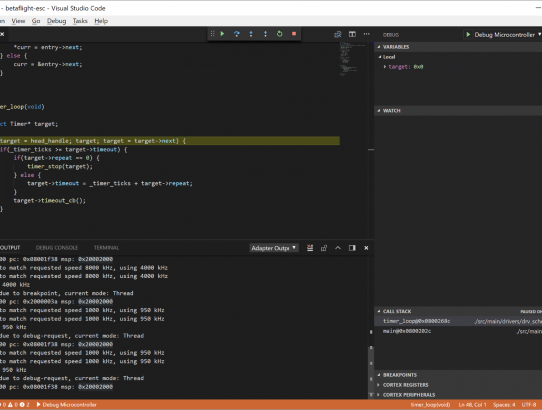
This should allow you to build your ARM based projects, and in the case of betaflight, allow you to make TARGET=BLUEJAYF4 within the Linux shell.
You will also need to install a few other apt modules. Make being the most obvious, but to run the unit tests you will need clang, and libblocksruntime-dev.
sudo apt-get install make clang libblocksruntime-dev
Here is my updated tasks.json to enable the build:
{
    "version": "2.0.0",
    "type": "shell",
    "presentation": {
        "echo": true,
        "reveal": "always",
        "focus": false,
        "panel": "dedicated"
    },
    "tasks": [
        {
            "label": "build-BLUEJAYF4",
            "windows": {
                "command": "bash",
                "args": [
                    "-c",
                    "make TARGET=BLUEJAYF4 DEBUG=GDB"
                ]
            },
            "group": {
                "kind": "build",
                "isDefault": true
            },
            "problemMatcher": ["$gcc"]
        },
        {
            "label": "clean-BLUEJAYF4",
            "windows": {
                "command": "bash",
                "args": [
                    "-c",
                    "make TARGET=BLUEJAYF4 clean"
                ]
            },
            "problemMatcher": []
        },
        {
            "label": "build-test",
            "windows": {
                "command": "bash",
                "args": [
                    "-c",
                    "make test"
                ]
            },
            "problemMatcher": []
        }
    ]
}
Note that the type is now a “shell”, and the command is “bash”, or more specifically “c:\windows\systems32\bash.exe”. The make is now moved to the command line arguments for “bash”. The “-c” merely tells bash to complete (exit) once finished. I have also simplified the problem matcher, to use the default one from the c/c++ module.
Note that you will need to be sure you are running the correct WSL if you have more than one installed. “wslconfig /l” will give you the list, and which one of them is the default.